Crochet Ice Skate Ornaments

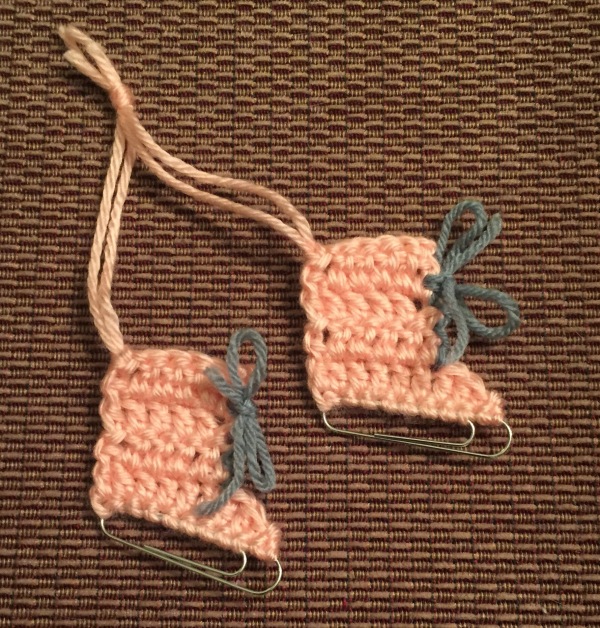
As mentioned in my previous post, I gave Christmas gifts to my department this year, and these handmade ornaments were the easy part. My grandmother made a few for each of her children many years ago, and I snagged one from my parents house and did my best to duplicate what she did.

Tools:
2 jumbo paper clips
2 colors of contrasting yarn
F hook

Instructions:

Row 1: Starting with whatever color you’ve chosen as the main skate color, make 10 sc in the top of the paper clip (I found that 8 sc in the bigger section and 2 sc at the end worked best for me).
Row 2: Don’t make a chain here! Skip the first sc, sc in the next st, hdc in the following st, and then dc to the end of the row (you will have a total of 1 sc, 1 hdc, and 7 dc).
Row 3: Ch 2 (counts as first dc), dc to end.
Rows 4-6: Repeat row 3.
Fasten off, then repeat for the second skate.

For the yarn with which you will hang them, I cut 2 lengths of yarn a little more than  twice as long as I wanted them to hang. Take one, fold it in half, and thread the loop through a corner of the skate (either will do, as long as you do the same corner for both skates). Then, take the length and pull it through the loop you just made to attach it. Repeat for both skates, then tie the loose ends together.

With the contrasting color, weave the laces – I cut off 10-12 inches to do this (I learned my lesson quickly; tying knots with tiny bits of yarn is super difficult). It’s difficult to explain this process in words, so hopefully the photos below will help illustrate. (It isn’t unlike lacing a regular shoe…if you didn’t have lace holes, at least.)

/home/wpcom/public_html/wp-content/blogs.dir/773/15438368/files/2015/01/img_6979.jpg

I’m pretty pleased with how they turned out! It’s a pretty easy and quick project, so it’s great for group gifts, like these.

/home/wpcom/public_html/wp-content/blogs.dir/773/15438368/files/2015/01/img_6981.jpg

/home/wpcom/public_html/wp-content/blogs.dir/773/15438368/files/2015/01/img_6982.jpg

/home/wpcom/public_html/wp-content/blogs.dir/773/15438368/files/2015/01/img_6984.jpg

Cookie Mix In A Jar, Disaster In My Kitchen

In the last year since I’ve updated this blog (whoops), I got a new amazing job for an amazing company in an amazing department with amazing people. (Did I mention my work life is great?) I only started in January 2014, so this is my first Christmas season with everyone, and I didn’t even think about gifts for everyone in my department…of 9 other people. That’s a lot of thinking, and I can barely buy gifts for my husband who I’ve known for 10 years. So, I started looking for ideas online, and realized I could finally try something I’ve been wanting to try for a while but never had the occassion – the (in)famous cookie mix in a jar.

Image from The Creative Junkie

I’m sure you’ve seen these all over the internet, especially if you’re on Pinterest (I’m a recovering Pinterest addict myself). They look super cute and are great and inexpensive gift ideas, perfect if you work in a department with 9 other people. Plus, it’s literally dumping ingredients in a jar. How hard could it possibly be? (hahahahahahaha.)

I looked around and decided on following these instructions from AllRecipes. I got 9 1-qt mason jars from Michael’s for $2.49 each, and decided I would use a few sheets of Christmas craft paper I already had to cut into tags, and print out the instructions on pieces of paper and just glue them to the festive paper. (On an unrelated note, I also decided I would crochet small ornaments to go with these, which I will discuss further in another post.)

Since I purchased the jars on a Friday night, and wanted these prepared to bring to work the following Tuesday, Saturday morning seemed like a good time to have a test run, since I had absolutely no plans on Sunday. I knew we didn’t have enough of everything for 9 batches, so I went to the supermarket before 9am to grab extra of everything. (Did I mention this was all happening the weekend before Christmas? I have been a master procrastinator since I was 7 years old.) I got home and reviewed the instructions; in hindsight, I should have seen a red flag at “1 1/2 c of flour,” but whatever it’d be fine.

/home/wpcom/public_html/wp-content/blogs.dir/773/15438368/files/2014/12/img_6961.jpg

Not so much.

This would be perfect if I didn’t still have to add a cup of chocolate chips! Guess who started baking cookies at 9:30 in the morning, with the organic butter I’d just paid a ridiculous amount for, since we had no regular sticks of butter.

I read through some of the comments on AllRecipes and was stunned that there was only one negative comment about actually fitting the ingredients. Everyone else claimed they packed and packed and packed with an ice cream scoop until it all fit nicely, but I didn’t have the time or patience for that. (Well, I had the time, but didn’t want to have an issue AGAIN, because now I definitely didn’t have enough butter for another batch.) So I figured I could just halve the recipe, and add 2 each of the cookies I’d just surprise-baked, since now I’d have room at the top of each jar. Except…

/home/wpcom/public_html/wp-content/blogs.dir/773/15438368/files/2014/12/img_6963.jpg

Nice try.

/home/wpcom/public_html/wp-content/blogs.dir/773/15438368/files/2014/12/img_6964.jpg

These things spread to be HUGE. I will take some of the blame for this, because the recipe called for softened butter, and I stopped paying attention and half of my butter was melted. But really? There is no way I’m fitting these things in the mason jars.

Now, it’s not even 11am and I’m drinking white wine because this whole experience has me strung out. Plus now I have to wash all the dishes from my surprise baking session. At this point, I’ve already rinsed out the Fail Jar, so I refilled it but with half of all the ingredients.

/home/wpcom/public_html/wp-content/blogs.dir/773/15438368/files/2014/12/img_6965.jpg

A definite improvement, since now everything actually fits, but there is so much OBVIOUS empty space at the top, now I have to think of something else to fill it with. (Oh, and of course, this new job is for one of the biggest candy companies in the world, so putting some candy in a plastic bag and placing it on top would be pointless.) I toyed with the idea of literally dumping packets of hot chocolate into plastic bags, but then decided I would just cut the cookies up until they fit. (Cookie bites are a thing, right?)

/home/wpcom/public_html/wp-content/blogs.dir/773/15438368/files/2014/12/img_6986.jpg

/home/wpcom/public_html/wp-content/blogs.dir/773/15438368/files/2014/12/img_6984.jpg

The cookies were a huge hit, and everyone was appreciative. And maybe if I hadn’t done this less than a week before Christmas, it wouldn’t have seemed quite as tragic. But I’ve learned my lesson – if I ever want to attempt the cookie mix in a jar gift again, I’ll just make the cookies.

Santa Hat Pattern

My sister-in-law asked me if I could create a Santa inspired hat (initially for New York SantaCon). She texted me a photo for inspiration, and I came up with this:

Sorry everyone, I’m not single.

I even remembered to write down the pattern!

Hat

Create a magic ring.
Round 1: Chain 3 (counts as first dc here and throughout; the first dc in each round should be a ch3!), 9 dc (10 dc)
Round 2: 2 dc in each dc (20 dc)
Round 3: *2dc in first dc, 1 dc in next dc* repeat from * to * until end (30 dc)
Round 4: *2 dc in first dc, 1 dc each in next 2 dc* repeat from * to * until end (40 dc)
Round 5: *2 dc in first dc, 1 dc each in next 3 dc* repeat from * to * until end (50 dc)
Rounds 6-12: 1 dc in each dc (50 dc)

Do not bind off after round 12!

Earflaps

Row 1: Turn, ch3 (does not count as first dc, here and throughout earflap), dc 7, turn
Row 2: ch3, dc 7, turn
Row 3: ch3, dc2tog, dc3, dc2tog, turn
Row 4: ch3, dc2tog, dc1, dc2tog, turn
Row 5: 
ch3, dc3, bind off

Count 20. join at 21st and repeat earflap pattern. (I would do row 1 of the second earflap, and then make sure it lines up to your own ears. This is what worked for me!)

Belt

**For this, I just worked the first row of sc in the 10th row of the hat. Since you’re working sc over dc (worked in the round, no less, so I had to mess around with stitch placement to get them to line up), I wouldn’t suggest this method. I mean, it looks fine, but it’ll be much easier to sc a black strip, and just whipstitch or sew it to attach. So, I will give the instructions for a black band.

Chain 51, turn
Row 1: sc in 2nd ch from hook, sc to end, ch1, turn (50sc)
Row 2: sc in each sc, ch1, turn (50sc)
Repeat row 2 three more times. Attach around hat (mine wound up spanning rows 8-10 of the hat)

Buckle

All you have to do here is surface slip stitch in a vaguely squareish/rectangular shape. Just make sure the top and bottom parts of the buckle are on the red part of the hat, and that the buckle is centered in the front of your head. My buckle was 5 stitches on the top and bottom, and 6 stitches on each side.

Here is a video on how to surface slip stitch: slip stitch surface: http://youtu.be/EJ8FI5PJfvk

Edging

With a fur yarn (I don’t know of any other than Lion Brand Fun Fur), sc all round the hat.

Pom Pom

I used the wrap method, and used width of DVD case and wrapped ~60-70 times. This turned out WAY TOO BIG and lead to 45 minutes of trimming and 15 minutes of vacuuming all the bits. I attached it  just by tying a knot on inside of hat.

This project on Ravelry

Resurrection! And Goings-On

Ugh, where do I even begin?! After seven months, I am finally beginning to feel the crushing guilt of neglecting this blog. A big part of that was I mostly update about crochet, and I did a series of big project, followed by a bit of a lull, so there wasn’t a whole lot to update about over the summer concerning that. (You can see what I DID wind up up crocheting on Ravelry, however!)

Now, with the weather getting cooler (theoretically at least – the high is supposed to be 73 today), and Christmas approaching, I’ve been crocheting like a mad person. Also, by not going outside, I finally have to stop making excuses about the work I have to do on the INSIDE of the house. (Well, once autumn is over and we pick up the leaves in the yard. A bit of advice to homeowners, PICK UP THE LEAVES IN THE AUTUMN! We didn’t last year and have huge dead patches of grass now.) So, there should be plenty to talk about in the next few months, hopefully!

In the meantime, I’m actually starting to be active on Twitter, so you can follow me there. It’s a lot of retweets from parody accounts and pictures of my cat, but isn’t that all Twitter REALLY is?

In the meantime, here is a really attractive photo of me at Coldstone Creamery two nights ago. It was delicious and almost guilt-free.

20131017-084514.jpg

National Craft Month: Luggage Handle

Okay, so updating weekly with sewing updates didn’t go very well. I have a lot of non-sewing stuff I’ve been working on and got sidetracked! But I am now back to tell you about a new project I sewed – a luggage handle!

021

Our luggage is black (as you can see) so when we had to get it from the turnstile on our honeymoon, it was an aggravating guessing game. When I found this tutorial (and its simplicity!), I knew it would be great to try out for National Craft Month!

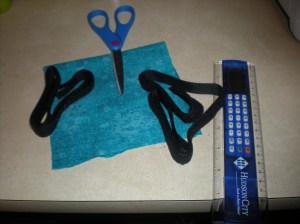
The main change between my version and the tutorial from Little Birdie Secrets is that I didn’t use batting – I just felt no need, and I’m quite the penny pincher. That being said, I didn’t cut the fabric into two pieces – it was unnecessary since I wasn’t using batting. So this is what my supply list looked like:

001

And let’s not forget an attention-seeking cat!

010

You’re doing something so I have to be all up in your business, since I am a cat.

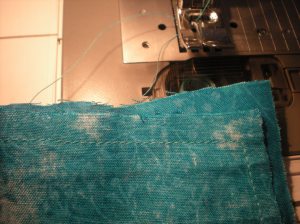
I also didn’t use straight pins, because I couldn’t locate them at that moment and didn’t really care to, since this wasn’t a garment that needed to be extremely precise. Hence edges that looked like this!
007

Besides what I mentioned, I followed the tutorial, and there isn’t a whole lot else to note. We could talk about how I’m lazy (again), and didn’t iron:

Also notice the awesome straight lines! NOT.

Also notice the awesome straight lines! NOT.

Other than my previous notations, I followed the tutorial. It will be so satisfying next time we’re in an airport!

National Craft Month Intro & Set-Up

As some crafters may know, March is National Craft Month. I’ve been thinking about it for a few weeks, how I wanted to do something to “celebrate,” but was drawing a blank. Then it hit me – maybe I should unbox the sewing machine I purchased last summer for the first time, and actually use it!

Every week this month, I’m going to write a post about the projects I’m doing with my sewing machine. I am an absolute beginner – that is to say, I haven’t used a sewing machine regularly since home economics class in middle school. I’m very excited to start sewing, and hopefully get to the point I am at with crochet where I can pick up almost anything in the store and say, “I can do that!”

My sister sews on a fairly regular basis (she is basically an apron extraordinaire), so I invited her over one night and we went to the local fabric store for supplies. I got 3 yards of a plain forest green cotton, 1 yard of a decorative blue cotton, matching thread for each, extra needles (for when I surely break mine), and Velcro.

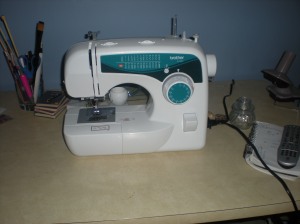
Then it was back to my house to eat dinner and set up the machine. (I felt more comfortable having someone there who was familiar with the hardware – sewing machines have more parts than I am used to with crafting and I was afraid I might break it, regardless of having the instructions.) There’s no point in photographing and explaining how to wind the bobbin, load it, and load the thread and thread the needle, etc. If you are here and having a sewing machine, you likely know how to do it; also sewing machines are slightly different. While setting mine up was MOSTLY the same, my sister came across one or two things that were different from her own machine.

008

The first thing I made was a heating pack. You know, the kind you just throw in the microwave for a few minutes and put on your neck if you have a headache or neck-ache. Or are just cold.

009

I used the tutorial found here. I didn’t pin anything, because I didn’t really care and couldn’t find my pins at that exact moment. Also I’m pretty lazy, but it was just a heating pad for myself, so I wasn’t particularly concerned. As stuffing, I used some white rice we had in the kitchen. The only thing I wish I’d done differently concerns the stuffing – it is SLIGHTLY overstuffed. I used one of the smaller boxes of Minute Rice and part of a bigger box we had leftover, which was a bit too much. You could probably get away with just one regular box of rice. Remember, you still have to be able to drape it around your neck!

Sunday Dinner

As a lady raised by two Brooklyn Italians, I know there is something special about Sunday dinners. A few months ago, my parents requested that we all get together for one dinner per month (which, if you are a New York Italian, you know is less often than usual.) Usually we would just go to my parents house and eat, but my husband and I invited them over for January dinner.

With my immaculately set table.

With my immaculately set table.

I tried my hand at these crock pot mashed potatoes I’d found on Pinterest AGES ago…might have been one of the first things I’d pinned. They turned out pretty good! Hand mashing as opposed to using my mixer made for more chunks of potatoes, but that isn’t something I really consider a con. It was much easier to clean the crock pot than the mixer, that’s for sure.

My husband made this prime rib recipe. I tend to not cook meat ever, only SOMETIMES beef. I’m always afraid of not cooking it long enough and making people sick…pretty ridiculous given that you can just CHECK THE MEAT, but I never said it was logical. Delicious!

My sister is a vegetarian, so I made a broccoli cauliflower casserole for her, which doubled as a side dish for everyone else. This is something I’ve made for us for dinner in the past and I freaking love it. For those who are skeptical, when we ate it for dinner those times, we had some kind of protein side dish; for example, I remember on one occasion we had Swedish meatballs!

I just wanted to share these recipes with you since everyone was a fan of them that day!

Kids’ Winter Hats

Over the summer, my cousin asked if I could make winter hats for her two children. She gave me colors, I sent her a few photos, and we came up with a game plan. Four months was plenty of time to make hats for an almost-4-year-old boy and a one-year-old girl.

Shamefully, I handed them off to the recipients on January 19. I’ll justify by saying that we had a warmer-than-usual winter. (Which, for the record, is true in New Jersey. It was 60 degrees only a two weeks ago.)

027

032

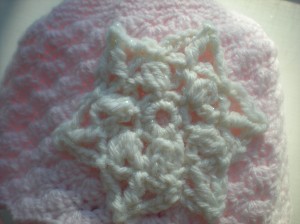
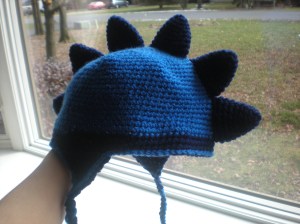
I made these patterns up; I didn’t write them down but they are basic crocheted hats. The girl’s hat was done in a shell stitch, mostly because the yarn I was using was fine and I would have been doing it forever if I did it in single crochet. However, it turns out it added great character to it! Ironically, that is not the first earflap hat I made for that boy, but he was three days old the last time he wore the first one. The spike pattern came from here.

Tip: I didn’t have head sizes, so I used average head sizes from a few places online: here is one of them, here is another. I came to the conclusion that 7 inches in diameter was a good size for a four year old. This is not the diameter of the crown, it is the diameter of the actual hat! The crown should be slightly smaller than the diameter of the hat you are aiming for.

Girl’s Winter Snowflake Hat Ravelry Page
Boy’s Winter Dinosaur Hat Ravelry Page

Decorating for Valentine’s Day

I’m not a huge fan of Valentine’s Day; I’m one of those people who just never really saw the point. As it turns out, my dating anniversary with my husband was a few days after Valentine’s Day, so we never bothered celebrating; now that we’re married we’re probably going to ignore it almost completely. (Winter anniversaries ARE THE WORST, so glad our wedding anniversary is in the spring.)

Anyway, I was surprised when I found myself wanting to decorate the house, even if it was only slightly, for Valentine’s Day. I couldn’t figure out where the urge was coming from. I think it’s the color schemes I’m attracted too – coming off the sparkly-brightness(TM) of Christmas into dreary grey January is welcome at first, but it gets dull rather quickly and the bright reds/pinks/purples/whites offset the seasonal depression that starts to set in.

004

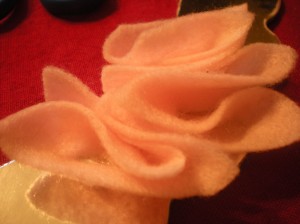
This door decoration is a combination of a few door decorations I’ve seen around the internet. The base letters are made with 12″ silver cake platters that I had lying around from a wreath I had never gotten to make. I’m lucky that X and O are pretty basic letters, but if you want to do something like this with anything other than these letters (or even if you are doing an X and O) I highly suggest getting some ready-made letters. These were EXTREMELY annoying to cut, they shed cardboard dust everywhere, and more than once my crafting knife blade almost came out of the holder.

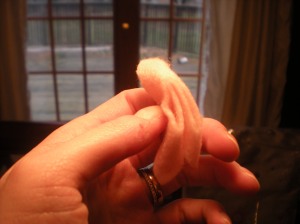
I used felt to make these petal looking things:

017
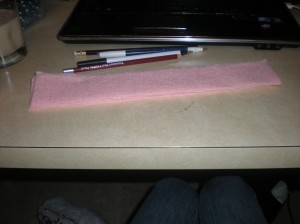
First, I cut the felt sheet into quartered strips.

023
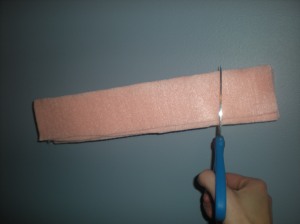
Then, I cut each of the strips into squares (or something vaguely square-ish). The shape doesn’t have to be perfect because you won’t notice later.

Then I folded each square in half to make a triangle…
007

And then in half again…
008

And then I snipped off the bottom.
012

Then I just covered the bottom with hot glue and pressed it on my base!
016

In addition to the door, I made a last-minute-I-don’t-feel-like-buying-anything centerpiece with some items I already had.

025

With my immaculately set table.

With my immaculately set table.

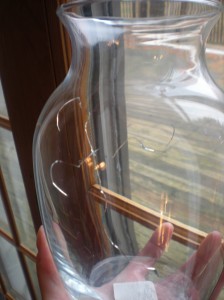
The white branches and crystal…things were part of a centerpiece I took from someone’s wedding reception in the beginning of January. The glass beads I had lying around, and this is the replacement vase for the one I broke in the process of putting this simple centerpiece together…

003

Apparently mixing glass beads in a glass vase is a terrible idea that results in tragedy. WHO KNEW.

Face Wash Using Oil Cleansing Method

If anyone has followed my blog since the beginning, or if you have trudged through the archives, you’ll recall my brief foray into the no-shampoo movement, where instead of using shampoo & conditioner on your hair, you use a baking soda-water mix as shampoo, and ACV-water mix as conditioner. I never stuck with it, because besides trying to use a watery substance as shampoo, I have such short hair easy hair that I never noticed any benefits. Also my current shampoo smells like Cocoa Puffs which is so much better smelling than that ACV rinse. (Try as I might, I cannot bring myself to use ACV for all the amazing health benefits, because it just tastes & smells SO AWFUL.)


With the advent of Pinterest, I’ve come across loads of other DIY beauty tips, and the oil cleansing method to wash ones face was rather intriguing. Partially because it was oil, and partially because my cleanser was something like $50 for a bottle (admittedly, a rather big bottle, but still). So when I finally got to the end of the cleanser I’d been using, I decided to give it a go, using the previous link from SimpleMom.net as a guide.


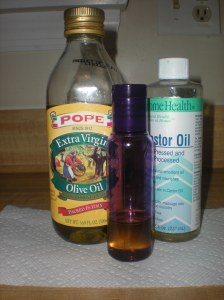
Now, oil seems counter-intuitive to wash your face with, but as the Tsh says, it actually makes sense – oil cancels out oil. This immediately made sense to me, and I probably averaged a B- in my science classes in high school. Since I tend to have oily/combination skin, I used 3 parts castor oil to 1 part olive oil. For some reason, actually finding castor oil was the most ridiculous part of this method. I wound up ordering off of Amazon. I mixed it, massaged it into my face, and used a hot washcloth to steam my face.

Oils

After only 2 days, I noticed my skin was less oily overall. Combine that with the cost, and this cleanser is here to stay for me. I think I might need to add a bit more olive oil, as my skin sometimes feels a little dry afterwards, but I’ll wait a few months because I can’t tell if it’s the mixture or the cold weather. The only con I have found to this is that it’s oil. That’s to say, if it gets in your hair, you will look like a greasy hobo. So, I only wash my face right before I’m about to get into the shower so I can be as messy as I want. (I’m not an overly messy person, I’m just lazy about being neat.)


If you try this and come across issues, or just want more information, the comments on the blog post I linked have great advice. I also exfoliate with either baking soda, or a mixture of honey and brown sugar, so I just need to find a mask that I love and I’ll be set. (By the way, the honey/brown sugar exfoliation is DELICIOUS when it accidentally winds up on your lips.)


Have you tried anything like this? Would you? If you have, what were your recipe and results?

Don’t forget to like on Facebook and follow me on Twitter!